Making Coffee?Learn to Brew Like a Pro
At DISTRICT Roasters, we are passionate about maintaining the highest standards of product quality. That’s because we believe that everyone is entitled to great coffee. To help ensure maximum enjoyment from your next cup, we’ve put together a few tips to help you brew like a pro!
Choosing the Right Coffee Maker
For most people, the words “coffee maker” probably mean small countertop machine that combines messy coffee grounds, cheap filters, and hot water to fill a glass carafe with warm coffee. However, there are many great options to choose from depending on what sort of coffee experience you prefer. Today we’re going to introduce you to the Aeropress, the French Press, the Chemex, the Single Serve Pour Over, and we’ll also look at traditional drip and espresso machines.
Each of these offers something unique and we recommend trying them all until you find a favorite. Remember, these are just pointers. We’d encourage you to play around and find your own groove - there are no rules. Who knows? Once you master your own technique, you may end up keeping them all in your regular coffee rotation. So what are we waiting for? Let’s get brewing!
The Aeropress Coffee Maker
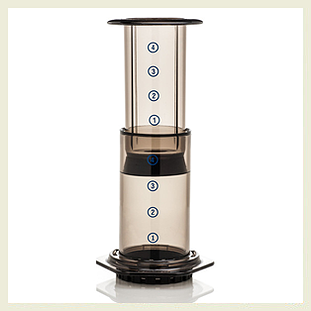
Aeropress coffee makers are known for being fast, clean, and efficient coffee brewing tools. While the aeropress may not yet be quite as common in coffee-loving households as french presses or pour over devices, it is an outstanding addition for anyone who loves being able to make coffee any time they want it. Aeropress devices are available in glass, hard plastic, copper, and other materials so finding one you like should not present a challenge. One last attractive feature is that it can be used to make delicious espresso as well as regular coffee.
How to Use Your Aeropress
The aeropress is all about speed and simplicity. It doesn’t take much to make a great cup of coffee with this brewing device.
Step 1: Grind about 3 tbsp (roughly 17 grams) of fresh coffee. The grind will be relatively fine, as you want its consistency to be something like table salt. While your coffee is grinding, you can also be bringing your water to a near boil. Many bloggers recommend reaching for a temperature between 175°F and 195°F but we generally recommend going on up to around 205°F or 96°C.
Step 2: Place your brewing tube upside down on a flat surface. When we say upside down, we mean the part of the tube that you pull out will serve as the base. Drop the plunger into the brewing tube so far that the black rubber piece will line up with the circle that surrounds the number 4 on the side of your tube.
Step 3: Remove the cap and scoop the ground coffee into the chamber.
Step 4: Pour hot water over the coffee. Cover the grounds and let them bloom for about 30 seconds in the water. After that time has passed, continue pouring to the top of the “3” level.
Step 5: Use a spoon to stir the coffee grounds and warm water gently for about 5 seconds.
Step 6: Continue pouring warm water into the chamber until it’s full.
Step 7: Replace the cap and put a paper filter into it. Make sure the cap is screwed tightly on the chamber and drizzle warm water over the paper filter (just a few drops will do).
Step 8: Cover the cap and wetted paper filter with the mesh plastic piece that that twists on to the cap.
Step 9: Carefully flip your aeropress over with a coffee mug directly beneath your filter and cap.
Step 10: Press down firmly and consistently on the plunger. As the water evacuates into your mug, you should hear a hissing sound. Press until all the coffee has been released from your aeropress.
Pro-Tip: Don’t worry if the flavor of your coffee is a little overpowering. That’s normal. Just cut the mix with some more hot water until you find the taste you love.
The French Press
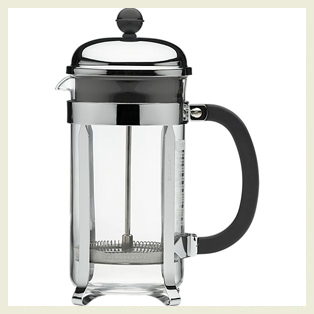
As old as coffee itself, the French Press is a classic, old-fashioned coffee maker. It’s an extremely convenient, quick and easy way to make a cup or two with minimal effort. Because they’re so easy to use and don’t require any electricity or other external power source, they’re a great option if you’re looking for something portable. They’re perfect for camping, backpacking, or even making coffee at work.
Directions for Using a French Press Coffee Maker
When using a french press, you only need two things: Great coffee and clean water.
Step 1: Grind your coffee. To make an eight-cup French Press, you’ll need to grind about 8 tbsp, or 120 grams, of your favorite fresh-roasted coffee beans to the consistency of dry breadcrumbs.
Step 2: Preheat your french press by pouring hot water into the glass and over the wire plunger. Let the water sit for 30 to 60 seconds and then pour it out.
Step 3: Once you’ve emptied your pre-warmed french press of hot water, remove the plunger and pour your ground coffee directly into the bottom of your glass carafe.
Step 4: Pour clean, hot water over your coffee grounds. The ideal temperature for your water is around 205°F or 96°C so be careful not to splash any on your hands. Pour enough water so that your french press is about half full and then set a timer for four minutes.
Step 5: After about a minute has passed, stir the top layer of the water gently and slowly pour hot water into the press. Go ahead and fill your french press at this time. The coffee grounds should rise with the water.
Step 6: When your four-minute timer is up, plunge the wire filter slowly but steadily into the glass carafe. This will push the ground coffee back to the bottom of the french press while letting the freshly-infused hot water pass through the mesh. Just like that, you’ve made coffee!
Step 7: At this point, go ahead and pour your fresh coffee. If you leave any coffee in the french press, it will be stronger and potentially a bit mud-like when you come back to it later. Remember, leaving coffee in the french press continues the steeping process.
Step 8: Enjoy your favorite coffee or blend however you take it!
Pro-Tip: Cleaning your french press is of the utmost importance. Always use warm, soapy water between uses to clean the glass container and the plunger. Double-check your plunger as well because old grounds tend to get caught in the wire filter and you won’t want them coming back to visit the next time you’re using this device. Luckily, most french press coffee makers use plungers that can be completely disassembled by simply unscrewing the wire filter and plunger from the baton.
Chemex Pour Over Coffee Maker
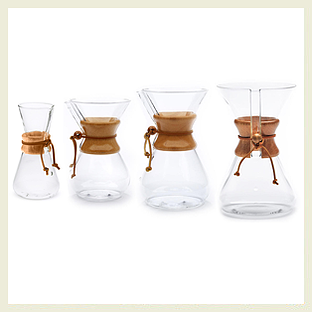
The chemex coffee maker is the ideal addition for coffee lovers who enjoy the timeless convenience of the french press. Requiring nothing more than tasty beans and clean, hot water, the chemex is a great option for brewing at home or on the go. If you’re the type of person who enjoys your java throughout the work day, we highly recommend hiding a chemex in your desk drawer!
Making Coffee With a Chemex
One of the other things that makes the chemex such a popular coffee maker is that they are available in a variety of sizes. Regardless of how many cups you make, though, we recommend following the same steps.
Step 1: The amount of coffee you’ll need with depend on the size of your device. We recommend using about 1 ½ tbsp for every 10 ounces your device holds. The standard chemex makes roughly 40 ounces so for this particular size we’d say to grind 6 tbsp (about 34 grams) until the coffee has the consistency of sea salt.
Step 2: Run hot water through the chemex’s mesh filter to pre-soak and prep the device. Once all rinse water has passed through the mesh place it atop the glass carafe.
Step 3: Scoop your coffee grounds into the filter.
Step 4: Bring your water to a near boil. We recommend heating the water to around 205°F or 96°C. Once the water reaches an appropriate temperature, slowly pour over the grounds. Pour enough to saturate the grounds and be sure to pour around the filter so as to wet all the grounds.
Step 5: Let the grounds bloom for about 30 seconds while the first pour runs through the filter.
Step 6: Pour hot water slowly in a circular motion until your chemex is nearly filled. Be sure to distribute the water evenly instead of putting the entire flow into a single spot. This will dilute your coffee and leave the majority of your grounds under-utilized in the brewing process.
Step 7: Watch your chemex for a moment to see if it becomes full. If after 30-60 seconds it still hasn’t, go ahead and pour a little more water into the coffee grounds. Repeat this step until the glass container is full up to the bottom of the filter.
Step 8: Remove the filter, with the coffee grounds in it, and insert the topper into the opening of the carafe. Let your coffee ruminate for 30-60 seconds then take a deep whiff and enjoy the aroma as you pour yourself a cup.
Pro-Tip: Most experienced gardeners will tell you that spent coffee grounds are terrific for composting. One attribute that makes the chemex unique is that the coffee grounds are left in the open air throughout the brewing process. Because they rest in the removable filter, it’s quite easy to retrieve the grounds without much mess or risk of getting burned. If you save your grounds, simply dump them into a glass container when you move your filter and insert the topper into your chemex. Once the grounds have cooled, add them to your composting mixture. However, be careful not to oversaturate your mix with coffee, as the acidity can be harmful to some plants if it isn’t balanced out with nutrients from other organic elements.
The Single Serve Pour Over
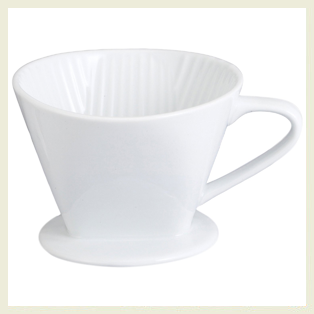
Single serve pour over units are becoming extremely popular coffee makers in their own right. Because they only yield a single cup, they’re incredibly handy for those dreary afternoons when an otherwise productive workday is getting wrecked by a 2:30 slump. Functioning similarly to chemex coffee makers, single serve pour overs require only good beans and hot water to make a great cup of coffee.
Pour Over Coffee Instructions
Step 1: Measure out about 1 ounce or 29 grams of coffee for every 12 ounces of water you’re planning to pour. Grind the coffee to about the consistency of coarse sugar or sea salt. It should be a bit gritty - nothing like powder.
Step 2: Place the pour over atop your favorite coffee mug. Pre-soak a paper filter with hot water and place into the pour over cone. Make sure there isn’t any water remaining in the cone or in your mug. If there is, pour it out.
Step 3: Put your ground coffee into the filter.
Step 4: Pour heated water over the coffee. The desired temperature for the water is 205°F or 96°C.
Step 5: Just like with the chemex, pour your water in a circular motion so as to ensure that all the beans are being wetted. As your coffee drips into your mug, keep an eye out to make sure you don’t overfill your cup.
Step 6: Once the mug has been filled to the desired level (typically around 12 ounces), stop pouring. Wait 30-60 seconds to ensure that all the water in your pour over cone has a chance to drip through the filter and into your mug.
Step 7: Remove the single serve pour over from your mug and enjoy a fresh, hot cup of joe!
Pro-Tip: When pouring hot water into your pour over cone, make sure to pour slowly. You want to allow each drop to rest among the ground coffee and really embrace its essence. That is how your coffee gets its great flavor, after all. Pouring too fast will lead to weak coffee and keeps denies your grounds from the opportunity to live up to their full potential.
Traditional Auto Drip Coffee Maker
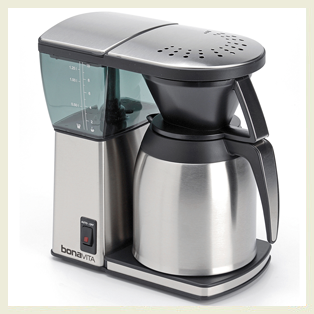
Say what you will about electric coffee makers, but they’ve gotten the job done for millions of coffee drinkers throughout the years. Auto drip coffee makers eliminate some of the hassle and can make a large enough pot of decent coffee to serve the entire family. The problem that many such coffee makers will face, however, is that they don’t always sustain ideal temperatures - especially cheap models. This is harmful to the finished product because the failure to maintain adequate temperatures yields weak, under-extracted coffee. If you are considering a traditional auto drip coffee maker, the most important thing to consider is the product’s ability to hold a temperature between 200-205°F.
Pro-Tip: If you are going to bite the bullet and choose a traditional drip coffee maker, don’t sacrifice quantity for quality. Some large coffee makers use huge tanks to make bigger pots of coffee. The problem here is that within those tanks, the water doesn’t heat evenly, so the quality of the coffee is subject to degradation throughout the brewing process. Even if the coffee comes out ok, there’s also the problem of keeping the pot warm. Because these coffee makers make so much coffee, they usually come equipped with a heating platform to “keep your coffee warm” throughout the hours after it’s been brewed. The problem here is that these platforms end up burning your coffee, especially once you’ve polished off half of the pot or more. These problems can easily be avoided! When it comes to choosing a traditional drip coffee maker, the best advice we can give you is to stay small and keep it simple.
Electric Espresso Machines
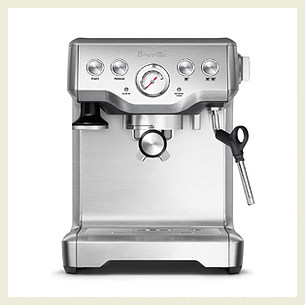
The mere mention of espresso is nearly enough for a coffee lover’s mind to transcend reality. You can practically smell it, as if the very word, espresso itself was enough to manifest a short cup within an arm’s reach. That’s not just me, is it?
Espresso is often called the “king of coffee” because of its robust flavor, versatility, and potency. It can be enjoyed on its own but also serves as the base for many popular hot coffee drinks. Having a reputation for being stronger than regular coffee, espresso does lend itself well to a pretty broad menu. However, espresso is nothing if it is not made well. Good espresso comes from good espresso machines, so it’s important to do your homework and make sure you’re getting the best bang for your buck.
Pro-Tip: While espresso is traditionally made using electric machines that also include milk frothing arms, espresso can be made using some of the simple, low-tech coffee makers described above. We recommend trying espresso made using your aeropress, french press, or single serve pour over. You might be surprised at how easy it is to make yourself a delicious pick-me-up without ever actually plugging a machine into your wall.
The Most Important Coffee Brewing Lesson
This is a pretty comprehensive list of coffee brewing tips showcasing several different coffee makers and how to use each of them. But guess what - there’s actually more you can do! If you’re interested in learning even more, the best thing you can do is get your hands dirty. Try everything described above and put your own twist on it. Experiment a little bit, and find things you love. That is the true key to enjoying great coffee.
No matter what you do, though, it all starts with choosing great coffee and making the most of it.

